Building a Xilinx parallel cable
For my initial tests (just to check whether this board works), I just used my Buspirate as XSVF player. I flashed it with the proper firmware for that, and connected everything except Vcc to the JTAG connector. For powering the board, I connected the 5 volt line of the Buspirate with Vcc of the breakout (to avoid damaging the LDO on the board). After I discovered that I needed to set the Vio jumper, and that the BP and the drivers are somewhat picky with regard to errors (and need a complete reboot), everything worked fine.
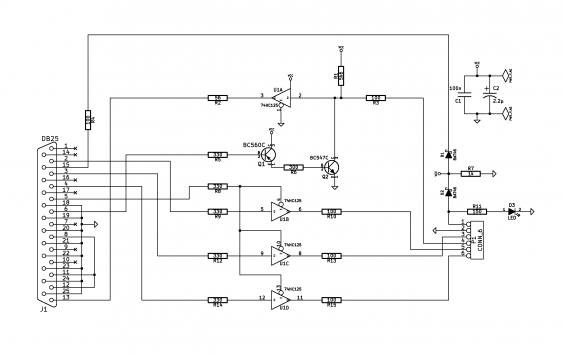
But it is a hassle to create a XSVF file for each try, and the BP is really slow. So I went to build a better programming cable. The easiest one is called “Xilinx parallel cable II” aka “DLC5”. It gets connected to the parallel port (I fortunately still have one, even if it’s a PCI card), and contains just some driver. The schematics are provided by Xilinx for free, but I used a variation by Peter Ivanov because I just happened to have only a single 74HC125 at hand.
The schematic is really simple:
I made some additional changes to it:
- use some different transistors
- used schottky diodes, because with normal ones the logic levels might be too low for the parallel port (3.3 volts minux 2 time 0.6 volts is only 2.1 volts)
- removed the power LED, since it just shows when the board is powered (and I have a LED there)
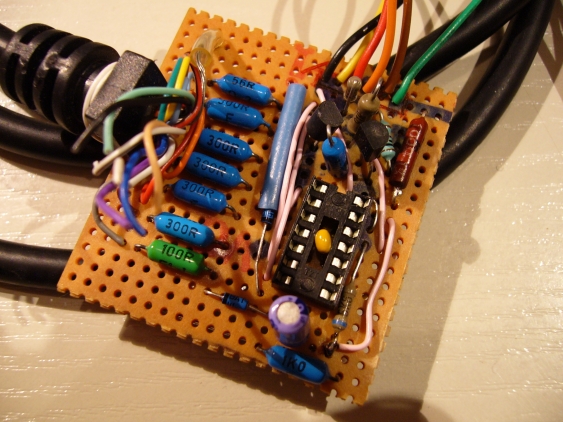
I didn’t bother with a proper PCB, but rather build it on a perf board. It looks a little bit improvised:
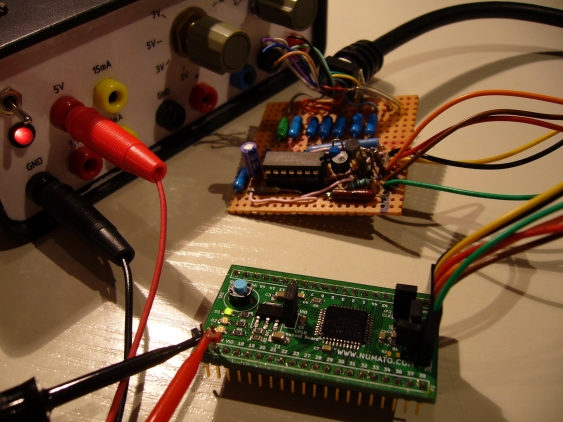
but it worked the first time I connected it:
Since I had troubles with Xilinx ISE complaining about the cable “being locked”, I went out and used open source tools for the first tests. urJtag doesn’t really work with the XC9572XL (some timings are wrong), so OpenOCD was the next candidate. It worked with the first try, but for just programming a XSVF file it really is too awkward to use. A much nicer tool I found is x3cprog, which is simple, fast and can read the JED files created by ISE, which spares the conversion to XSVF.
So now I’m settled with the tools, and can start really experimenting and building some stuff. Since I found a SPG8640BN programmable crystal oscillator in my parts bin (a nice chip which is unfortunately not available anymore), I skipped the generator project and decided I need a frequency counter. So stay tuned…


