iMSO-104 scope review
This is an article I wanted to write for quite some time, but I never came around. but it just means I now have some more experience with this scope, so the review is now only based on my first impressions.
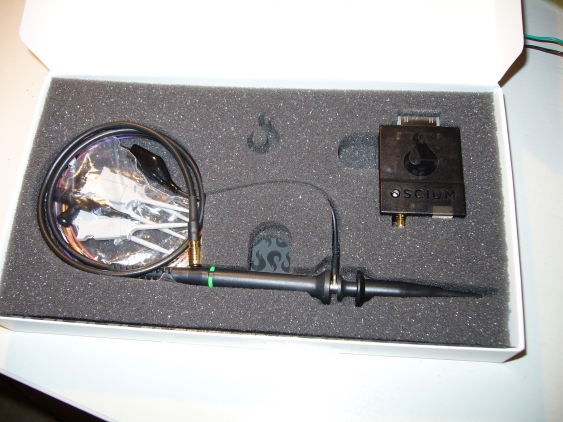
I came to my Oscium iMSO-104 scope as regular participant in the Cypress user community (which is a whole series of articles I want to write for an even longer time…). Basically it meant that as regular author their one gets rewards points, which can then be redeemed for interesting stuff. And so one day last fall a nice small package arrived at my door, containing an even smaller scope.
Unpacking and first impressions
My first thought was “that looks quite neat” and the second one “man, that thing is small!”. The package was really nice and stable, it looks like one can really use it for long term storage (even though its not plastic).
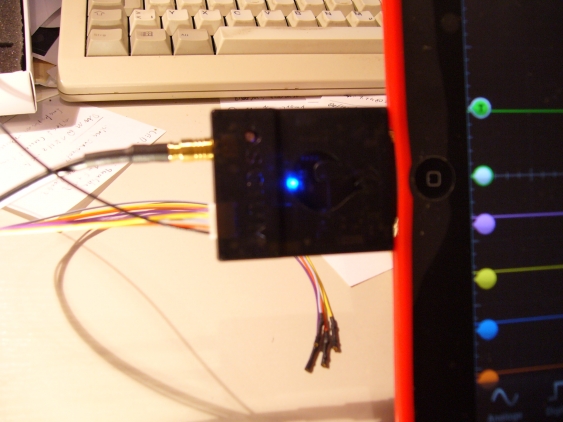
The scope module itself is really light-weight, but it feels quite sturdy. And this is really needed, since the connectors (a SMB connector for the analog input, and a small JST one for the digital probes) fit really tight and are difficult to remove. Until today I always remove the scope from the iPad before removing the probes, out of fear to otherwise break the iPad connector. Apart from that both probes look quite good.
The digital probes can be used both as female probes to fit them to header pins (as in the photo), or with the mini SMD grabbers attached (which seem to be quite good). The analog probe comes with three different tips, but I usually use the hook. Unfortunately there is only a single ground connector, and its crocodile is frequently too large to be used easily (many times I need to provide a special test pin to use it).
Using the iPad app
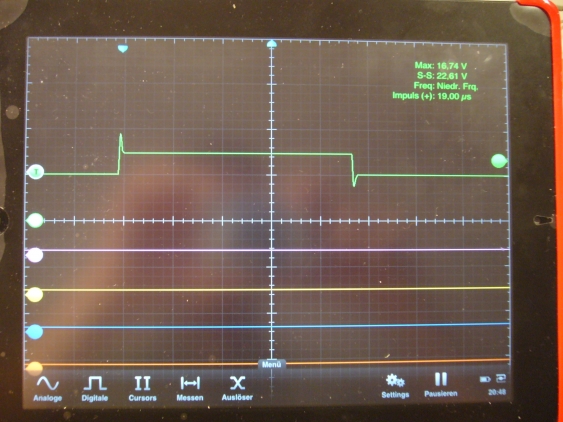
The user interface looks rather clean, there is nothing in the way of looking at the signals. Given that the iPad has a touch screen interface, many operations can be done that way too. Changing the (horizontal) time scale and the vertical resolution is done via the “pinch zoom” gesture. Changing the trigger level (when enabled) is done my moving the green marker (on the right) up and down - the feedback is the immediate. This feels quite nice. One can also move the signal around and rearrange them on the screen.
All other configurations done via the small menu on the bottom, which contains all available options. The trigger capabilities (both digital and analog) are only basic, there are no advanced options. For measurements, there are cursors available to measure waveforms. Additionally, up to six measurements can be shown (out of fifteen available ones) which are then displayed on the top right.
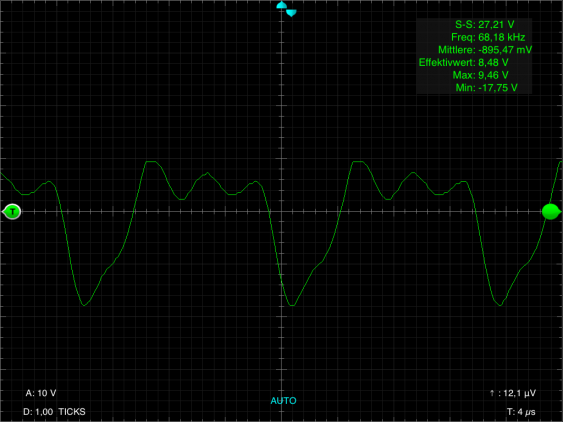
One can also pause the signal, and then send the screen by email to oneself. The images then look much nicer than when using a camera:
Some experiences
So, what are the experiences with the Oscium scope after half a year? Well, there is a german saying “never look a gift horse in the mouth”. Since I don’t own another scope, it has been an important addition to my lab, and I use it regularly. One cannot solve all problems with a multimeter alone… But its limitations in sample rate (12 Msps), analog bandwidth (5 MHz) and especially sample depth (240 values? This is ridiculous) make its use somewhat limited. In the third picture above, I measured a 9V square wave - and I wouldn’t have expected so much overshot, most of it coming from the probes.
The analog trigger modes are OK and sufficient for my needs, but I always get confused with the AUTO mode. More often than not I set it to just run continuously instead of triggering properly each time. And since the manual is rather small it doesn’t explain all the available options very well (it shows how to set them, but not what they mean and what they do). The digital trigger is IMHO even more limited, so I will use mostly my LogicBoost instead (it has also limited trigger capabilities, but with 256k sample memory I can live with that…).
I found myself typically attaching the probe to the circuit to analyze, and the fiddling with the controls until I get what I need. Thats one of the drawback of using a touch screen - it just takes longer to use when compared with just turning a knob on a real scope.
Thats why another gripe I have is with the analog probe. While its of good quality, the ground connector is way too large to be used properly. Even the normal tip is sometimes too large, but a crocodile clamp as the only option often drives me crazy.
One thing which is absolutely needed to use this scope is an iPad stand. You really want to have the iPad visible when working on a circuit, it cannot lay flat on the workbench. (Apart from seeing what happens this prevents putting stuff on top of it…). I for myself just build a simple one out of some scrap wood I had available, there was no need to by an expensive one.


