11 items are tagged with fpga:
Small update regarding the Numato FPGA boards
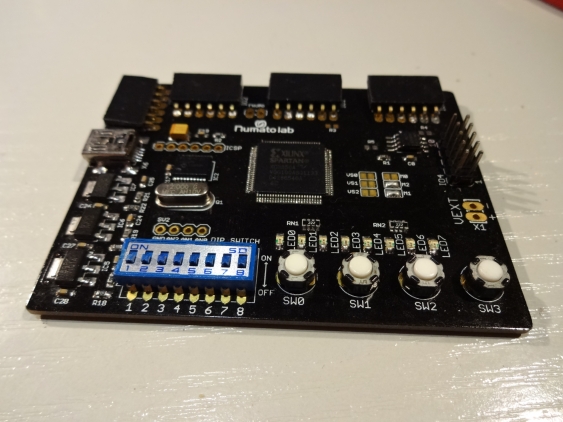
Just a quick update on the Numato FPGA boards I reviewed in the past. Right now they seem to be in the process of creating a whole eco system around them, to make it even easier to start the journey into the world of FPGAs.
While following their blog, I noticed that Numato started to add some breakout boards to their offerings, that are intended to go directly to their FPGA boards. Judging from the layout they should work directly with the Elbert beginners board. But Numato also has a new FPGA offering, the Waxwing mini module. Its just a bare bones FPGA breakout containing the bare minimum of components (FPGA, regulators, configuration memory and DRAM). There is a baseboard available which shares the same connector system as the Elbert board. so the new extension boards are working with it too.
As of now, there are the following modules available:
- Breadboard module, great for experiments
- Push button module for inputs
- LED module, they easiest way for output
- Seven segment display module with four digits
- LCD Display for showing data
- VGA display module for advanced display stuff
- SD card module
- CS4344 audio module
And there are also breakout modules for Mimas and Saturn, to connect the new boards to their large pin headers. Well done, Numato!
Right now Numato is giving away one of the VGA modules. If you miss that, just look every week at their blog for new freebies.
Using Xilinx iMPACT in batch mode
When using Xilinx ISE for programming CPLDs, there are two steps needed for programming:
- first implement the design (thats the process taking all the sources and translate to a SVF file)
- and then use iMPACT for program the CPLD with the SVF file
But when I started working with FPGA (with the new Numato Labs FPGA boards, I found out that there are now four steps involved until the design can be tested:
- first step is still implementing the design
- the a programming file needs to be created in ISE (thats the bit-stream file)
- then iMPACT can take the bit-stream file and creates a PROM file
- the last step is using iMPACT to transfer the PROM file into the Flash memory on the FPGA board
When checking whether a design can be translated properly, and adheres to all timing requirements, only the first step (design implementation) is needed. After that, all three steps need to be executed - every time. Thats tedious, and one even needs to have two different iMPACT projects for the last two steps (and the second one doesn’t seem to pick up changes to the PROM file, so iMPACT needs to restarted).
So it got time to automate this.
Continue readingA first look at the new Saturn and Mimas FPGA boards from Numato Labs
Even before the Elbert FPGA board (which I already had a chance to review)came out, Numato Labs worked on a FPGA board with a Spartan 6 on board (the Elbert board comes with a Spartan 3A). It was designed to contain an additional SDRAM module, but unfortunately the first version had some major issues. So I was rather delighted to some, nearly one year later, read the news that the board now got finished and is available. Even better, Numato Labs made two different versions: Mimas as a pure FPGA board, and Saturn as the larger one with additional SDRAM (512MBit DDR RAM).
Tom was, again, so kind to send me over one of each board. So I got a late christmas present (only by a week, and that even just because our local Fedex office closed down on the days between Christmas and New Years Eve). Thanks again!
Continue readingFirst tests with the Elbert FPGA board
A while ago Tom from Numato Labs was so kind to send me CPLD breakout board to give it a test drive. This led to a review and some interesting experiments with it. Unfortunately I had other projects ideas first, so it sat alone in its box for a while. But there will some tasks for it soon…
But a couple of weeks ago Tom asked me again whether I had use for some of the other stuff Numato has to offer. Since there was nothing I could use for a current project, he was so kind to send me a free Elbert FPGA board.
He was even so kind to send this via UPS (the CPLD board went out via normal postal service), even though that meant I needed to pay UPS fees in addition to the customs duties :( So it took less than a week for the board to arrive.
After unpacking, I found a rather small board (somehow I was expecting something big when thinking of a FPGA):
Continue readingImplementing the frequency counter part 2
So it’s finally time for the second part of my implementation. It took a while longer than intended, part because I changed more than originally intended.
Main goal was to connect to CPLD to a micro controller, to read out the counter results. The easiest way for the MCU would have been to provide a serial data stream (like SPI). But since we have 48 bits to transfer, I would need a 48 bit shift register - and there aren’t 48 registers left in the XC9572XL. So I did go an easier route and just build up a large multiplexer.
Continue readingFree PCB Build - XC95144XL Breakout Board
After finishing my last free PCB build I got a new coupon from Dangerous Prototypes. I decided to go for a xQFP prototype board this time. Unfortunately it went missing somewhere in the postal service, and there weren’t any more left. So I decided to go for a XC95144XL CPLD breakout board instead, which DP send out promptly.
Implemementing the frequency counter part 1
So this was long time since the last post. Working with a CPLD for the first time wasn’t trivial, and there are so many other things to do…
I will split this up into two parts, the first showing the frequency counter stuff itself, the second one dealing with connecting it to an MCU and showing the results.
Since I had already drawn a schematic for the simulation, which also worked fine, I decided to implement in the CPLD with a schematic also. I thought that it wasn’t too complex, and wanted to save the effort to learn VHDL or Verilog for later. It turned out to be a mixed success, mainly because the Xilinx schematics editor seems not to be intended to be used for larger projects (though it has some interesting features, it also has some quirks making stuff complicated).
Continue readingBuilding a Xilinx parallel cable
For my initial tests (just to check whether this board works), I just used my Buspirate as XSVF player. I flashed it with the proper firmware for that, and connected everything except Vcc to the JTAG connector. For powering the board, I connected the 5 volt line of the Buspirate with Vcc of the breakout (to avoid damaging the LDO on the board). After I discovered that I needed to set the Vio jumper, and that the BP and the drivers are somewhat picky with regard to errors (and need a complete reboot), everything worked fine.
But it is a hassle to create a XSVF file for each try, and the BP is really slow. So I went to build a better programming cable. The easiest one is called “Xilinx parallel cable II” aka “DLC5”. It gets connected to the parallel port (I fortunately still have one, even if it’s a PCI card), and contains just some driver. The schematics are provided by Xilinx for free, but I used a variation by Peter Ivanov because I just happened to have only a single 74HC125 at hand.
Continue readingInstalling Xilinx ISE under Linux
One of the tasks when starting with CPLD (or FPGA) development is to install the tool suite provided by the chip vendor. In the case of the XC9572XL this is the Xilinx ISE software. Xilinx provides a free WebPack version, which contains all the basic tools needed for the first designs.
On my initial test, I installed ISE 12.2, since I had in on a DVD somewhere. But for every start, it printed the error ‘couldn’t load XPCOM’, and some views weren’t working. So I started investigating. One of the things I wanted to make sure was that the installed version supported the Xilinx Parallel JTAG Cable III (a.k.a. DLC5), since I intended to build one. So I downloaded an older ISE version from Xilinx (10.1), and installed that one. Its release notes didn’t mention the DLC5, but the iMPACT tool (which is used for programming the CPLD) knows about it. This meant that the documentation was no reliable way to find out whether a version supports that cable or not - I needed to install them.
Continue readingProgramming a XC9572XL
It all started with a simple question by Tom from Numato Labs: “did you check whether the provided oscillator on the breakout works?”. So I took out my DMM and started measuring. And I got - nothing. After changing the jumper I got at least a reading for the 20 MHz setting (it showed 20.49 MHz). It turns out that my meter is only rated up to 8 MHz. So I went ahead and thought: Since I have a CPLD connected to the oscillator, why not just put some frequency divider (aka counters) on it and measure just the lower frequencies? And so did the journey begin into the land of CPLD programming…
First of all: Xilinx ISE WebPack 12.2 doesn’t really like my Kubuntu 11.10. It often complains about missing shared libraries (libxul and libxpcom). But the main features work, just some tools don’t load.
Continue readingReview - Numato CPLD breakout board
One of the things which have changed since I stopped with electronics is that much more things are now accessible to the hobbyist. 15 years ago I did know about CPLDs and FPGAs already. They cost about 50 Euros per piece, and the development software was way too expensive for a student.
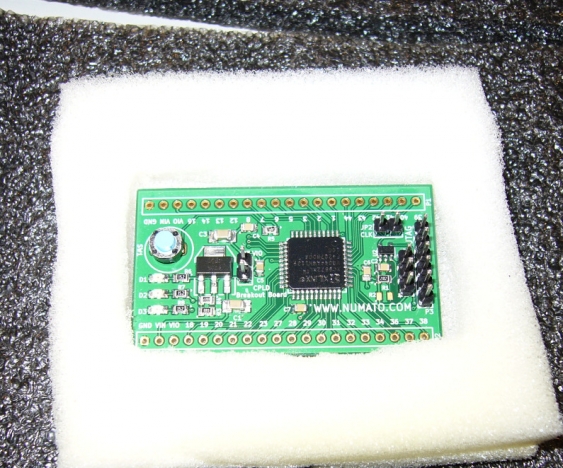
So I was already interested when I saw a Dangerousprototypes post about the CPLD breakout PCB from Numato Labs . Making a PCB for SMDs is still not easy for me, and ordering one takes either a long time or some significant amount of money. When I saw that Numato offered to send me a board, I asked to get one. I figured that ordering the pieces would set me back by maybe 5 to 10 euros, which is a really cheap entry to the world of programmable logic.
But Numato Labs surprised me - they offered me to send me a fully assembled board provided I write a little bit about it - and who am I to deny that?
So 2 weeks later I found a nice little board sitting on my desk, waiting to give it a try.
Continue reading
